Laminating documents and cherished mementos at home can be a practical and satisfying endeavor. From preserving valuable photographs to making DIY dry erase boards, laminating offers a world of possibilities. This guide will walk you through the process of laminating at home, explaining the essential steps and providing tips for achieving professional results.
Understanding the Basics of Laminating
Laminating involves encasing a document or item between two layers of plastic, usually with a heat-activated adhesive. The end result is a sturdy, waterproof, and wear-resistant laminate that safeguards your materials from damage and wear. Home laminating is commonly done using pouch laminators, making it accessible and convenient.
Materials You’ll Need
Before embarking on your laminating project, make sure to gather the necessary materials:
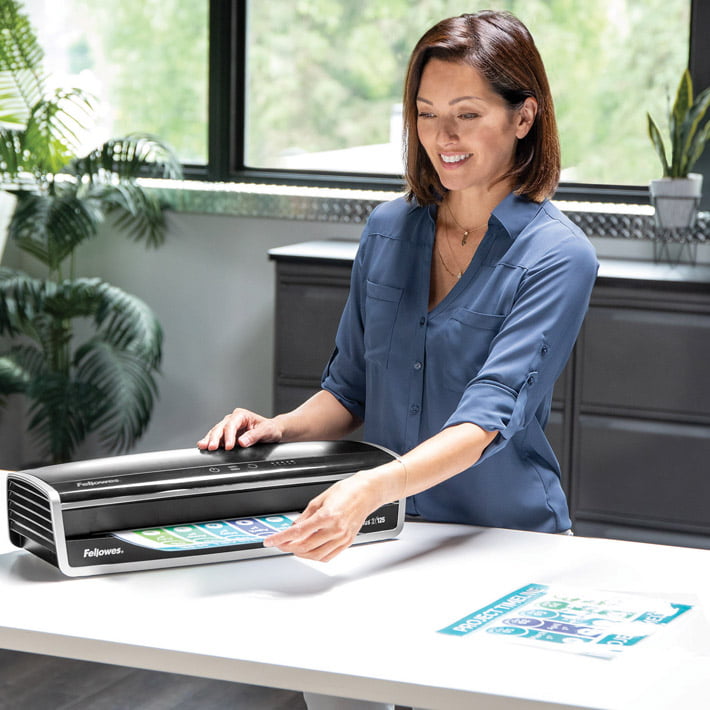
1. Laminator: The core of your laminating setup is, of course, the laminator. For home use, pouch laminators are the preferred choice due to their simplicity and versatility.
2. Laminating Pouches: These are plastic sheets with adhesive on the inside, available in various sizes and thicknesses. Choose pouches that are suitable for your specific project.
3. Document or Item to Laminate: Ensure that the paper or item you’re laminating is clean and free of any debris. This preparatory step ensures that your laminate will look flawless.
4. Scissors: You’ll need scissors for trimming the laminated item after the lamination process is complete.
5. Clean Cloth: Use a clean cloth to wipe down the laminator and pouches if they become dusty or smudged. Keeping these components clean ensures smooth laminating.
Steps to Laminating at Home
1. Preparing Your Document or Item
Begin by ensuring that your document or item is clean and free from dust or debris. Wiping it down with a clean cloth will help you achieve a pristine result.
2. Turning On the Laminator
Plug in your laminator and turn it on. Wait for the laminator to reach the desired temperature; most laminators have an indicator light that will tell you when they’re ready to use.
3. Selecting the Right Pouch Size
Choose a laminating pouch that can accommodate the size of your document or item. The pouch should be slightly larger than the item you’re laminating to allow for a border around the edges.
4. Opening the Laminating Pouch
Carefully open the pouch, being mindful not to let it stick to itself. Place your document or item inside, ensuring it fits within the pouch with an even border on all sides.
5. Inserting the Pouch Into the Laminator
Refer to the manufacturer’s instructions for your specific laminator to ensure you’re loading the pouch correctly. Different laminators may have varying instructions for pouch insertion.
6. Allowing the Laminator to Work
Once the pouch is inserted, the laminator will take over. It will feed the pouch through the machine, applying heat and pressure to seal the adhesive and encapsulate your document or item within the plastic. Patience is key; allow the laminator to complete the process.
7. Trimming Excess Plastic
Once the laminating process is finished, carefully remove the pouch from the machine. You can use scissors to trim any excess plastic from around the edges, leaving you with a neat and professional border.
Tips for Successful Laminating
- Choosing the Right Thickness: Laminating pouches come in various thicknesses, often measured in mils. Consider the item you’re laminating and its intended use. Thicker pouches provide more durability and protection.
- Preheating the Laminator: It’s advisable to allow the laminator to preheat for a few minutes before inserting your pouch. Preheating ensures a smoother lamination process.
- Avoid Overcrowding: Don’t overfill the pouch with multiple items or choose pouches that are too small. Overcrowding can lead to uneven results and may cause pouches to jam in the machine.
- Consider Cold Laminating: Some laminators have a cold lamination setting, suitable for heat-sensitive materials like photos or documents printed with heat-sensitive ink.
- Regularly Cleaning the Laminator: To maintain the quality of your laminating results, make it a habit to clean the laminator regularly. This prevents residue buildup that can affect the quality of lamination.
Creative Uses for Home Laminating
Beyond the basic purpose of protecting documents, laminating at home opens up various creative possibilities:
- Preserving Children’s Artwork: Laminating your child’s artwork helps preserve their creative masterpieces and can transform them into placemats or decorative items.
- Recipe Cards: Laminated recipe cards are a practical and attractive addition to your kitchen. They’re spill-resistant and easy to clean, ensuring your favorite recipes last for years to come.
- Photograph Preservation: Protect cherished photographs from fading, discoloration, or damage due to handling. Laminating photos can make them last for generations.
- Dry Erase Boards: Laminated sheets of paper can be transformed into DIY dry erase boards. These are perfect for notes, to-do lists, or educational purposes.
- ID and Membership Cards: Design and laminate your own ID or membership cards using appropriate pouches. This can be a cost-effective and practical solution for various needs.
In summary, laminating at home is a versatile and rewarding process that allows you to protect and enhance a wide range of documents and items. By selecting the right materials, following the steps, and considering the provided tips, you can achieve professional-grade lamination results for both practical and creative purposes. Whether you’re safeguarding valuable documents, creating durable recipe cards, or preserving cherished memories, home laminating is a skill that offers convenience and longevity.