Imagine that you’ve just returned from a magical trip to France – complete with croissants, cobblestone streets, and perhaps a few Eiffel Tower selfies. Now, you’re excited to relive those moments or looking to share them with friends and family. Showing the photos on the screen of your mobile could easily bore them, though… What is the solution? Make a thematic travel slideshow! With the right approach, you can recreate the atmosphere of any country and enjoy the process. In this article, we’ll guide you through ten practical recommendations for crafting a memorable travel slideshow. Let’s dive in!
1. Choose a Theme and a Matching Template
The first step in creating your slideshow is to choose a theme that encapsulates your recent travel destination. Was it France? Then find the one that feels “French” to you. Think about what really resonated with you during your trip. Was it the art in the Louvre? The food markets? Or perhaps the idyllic countryside of Provence? Once you’ve chosen your focal point, you can tailor the rest of your slideshow to reflect that theme.
Some slideshow makers — for instance, SmartSHOW 3D — have literally hundreds of thematic templates you can choose from when starting a new project. The program has a wealth of features while still being beginner-friendly.
For someone who has recently been to France, something like ‘Exploring Europe’ would suit perfectly — and, before we forget, a template by this name is there in the program we’ve just mentioned. Please see the last sentence as just an idea, though: after all, you might prefer ‘Autumn Blues’ or ‘Winter Tale,’ especially if you’ve been to Paris this winter.
2. Curate Your Best Photos
Now it’s time to gather your photos! Go through your camera roll (or whatever you used to capture your travels) and select the images that truly speak to your theme. It’s easy to get carried away, but aim for quality over quantity. Choose shots that complement each other and tell a story. As a rule of thumb, try to pick between 20 and 30 photos, which is a manageable number that won’t overwhelm your audience.

3. Find the Right Soundtrack
No slideshow is complete without music! To really evoke that French atmosphere, consider incorporating some classic French tunes. Think of Edith Piaf, Charles Aznavour, Yves Montand, Dalida, or maybe even some contemporary French pop music (it pales against the names we’ve just mentioned, but — tastes vary). The right soundtrack can transport your viewers right back to the streets of Montmartre or the sunny terraces of Nice.
In SmartSHOW 3D, sounds to slides can be added by double-clicking the Music icon on the timeline. We suggest you browse through the built-in audio collection of the program that has 200+ soundtracks — you might find something which is “French enough” to your taste.
4. Set the Right Pace
Make sure the music complements the pace of your slideshow; slow songs work well for reflective moments, while upbeat tracks can energise and excite. For how long should each separate photo of yours be shown? That largely depends on your audience, even though the recommended amount of time is 6 to 10 seconds. Your elderly grandparents would perhaps appreciate the slow pace of your travel slideshow, to fully appreciate all the details of your trip. Your younger workmates, on the other hand, would be grateful if you don’t keep them looking at one slide for too long.
5. Incorporate Text Wisely
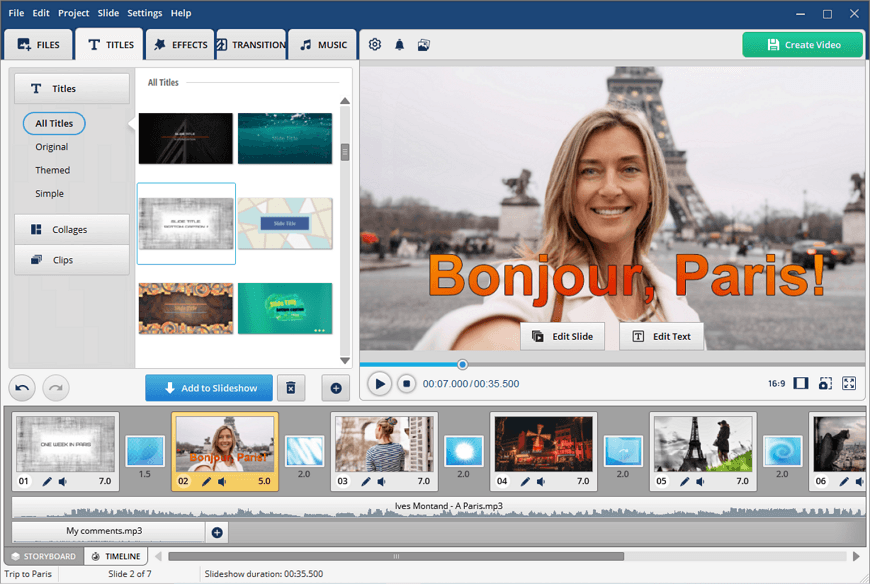
Adding text to your slideshow can provide context and enhance the storytelling aspect. Consider including quotes from your trip, fun facts about the locations, or even little snippets of French phrases you picked up along the way. However, keep it minimal — too much text can detract from your beautiful photos. That said, a simple ‘Bonjour, Paris!’ or ‘La Vie en Rose’ can work wonders.
To add some captions to your photos in SmartSHOW 3D, enter the Edit Slide mode and add a next layer. Should you wish to give a specific name to each part or “chapter” of your journey, feel free to explore the Titles tab with its collection of simple, original, or themed titles.

6. Pay Attention to Transitions
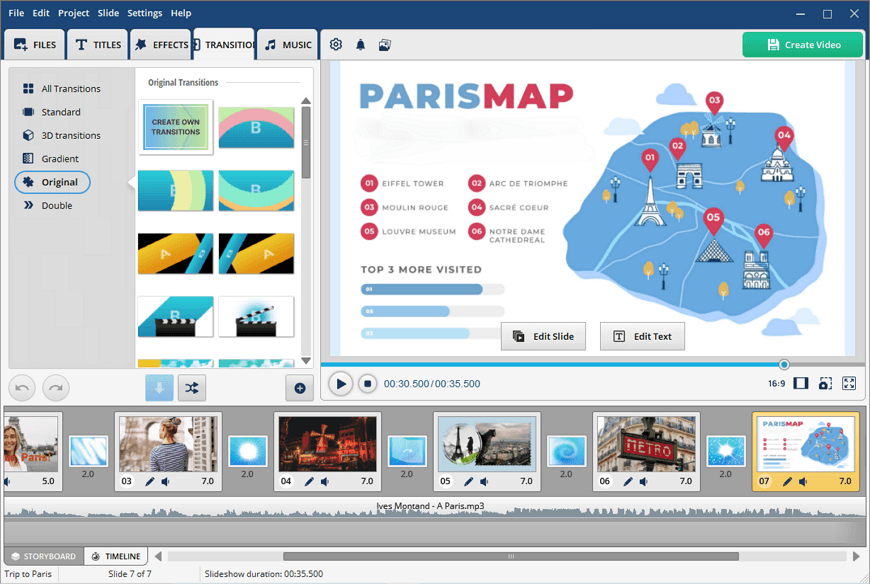
Subtle transitions between slides can elevate your slideshow. Instead of the standard fade, try something a little quirky like a flip or a page curl that mimics the feel of turning pages of a travel journal. This adds a touch of whimsy that can make your viewer feel like they are experiencing your journey first-hand.
There is nothing simpler than adding a transition between slides in SmartSHOW 3D. To do that, click on the Transitions tab and drag the one you like onto any small frame on the timeline. By the way the program has an enormous lot of transitions, both easy and original.
7. Create a Narrative Arc
Please don’t be scared away by this highbrow term! What we suggest is: think of your slideshow as a story. Start with an introduction – perhaps an image of your travel documents or the airport. Follow this with the highlights of your trip and conclude with a memorable moment or reflection. A narrative structure helps draw viewers in and makes them feel like they are going on the journey with you, rather than just seeing a collection of pictures.
8. Use Effects Sparingly
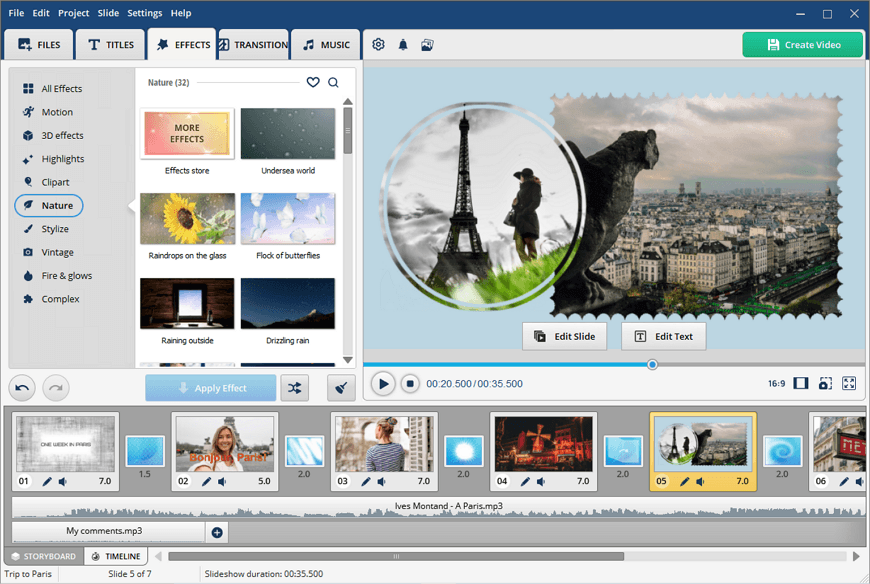
Modern slideshow editors come with a variety of effects that can enhance your slideshow, but use them sparingly! Overdoing it can make your slideshow feel cluttered. Instead, choose a couple of standout effects to accentuate your favourite images, such as a gentle zoom-in or a soft focus filter that gives your travel photos a dreamy quality.

SmartSHOW 3D has more than 450 built-in effects, including photo masks (shown in the screenshot above) and the like. Just to name some: your photos can be animated with falling snowflakes or set in motion. But, again, remember that ‘moderation is gold.’
9. Include Maps or Locations
To give your audience a sense of place, consider adding maps or pinpointing the exact locations of your adventures. You could include a quick slide at the beginning showing a map of France with arrows pointing to where you visited – from Paris to the Loire Valley, for instance. This not only informs your audience but also adds an educational layer to your slideshow.

10. End With a Personal Touch
Finally, round off your slideshow with a personal message. This could be a favourite quote from your trip, a thank you note to those who supported you on your adventure, or simply a few words about what the experience meant to you. Ending on a personal note not only closes your narrative but also leaves a lasting impression on your viewers.
Final Ideas
Creating a thematic travel slideshow is a delightful way to relive your experiences and share your adventures with others. By following these ten practical recommendations, you’ll be well on your way to capturing the magic of your destination in a way that resonates with your audience. So grab your photos, choose the perfect tunes, and let your creativity flow! Happy slideshow-making — and à bientôt!

