Preparing for your next adventure is always exciting. Exploring new cultures, trying different cuisines, and learning about the history and traditions of a foreign country can be an incredibly rewarding experience. The anticipation of stepping off the plane and into a whole new world can fill you with a sense of wonder and excitement. Whether it’s a bustling city, a tropical paradise, or a serene countryside, each new destination offers the promise of unforgettable adventures and memories to treasure forever.
However, before you can jet off, there’s one important task that needs your attention: sorting out your travel documents. And here we are, preparing our ID photos for a visa application . . .
The easiest way is of course to find the nearest photo shop in the vicinity. What if there is none in your small town, though? Or the one which is there isn’t exactly reliable, and the assistant who is supposed to take your photos simply has no idea about the specific visa requirements for an exotic country and so cannot help you.
Fortunately, you can now manage the task on your own! All it needs is a printer and a program to process your photos, such as Passport Photo Maker – by the way, you can find it here by clicking the link https://passport-photo-software.com/, and you’d better do it now, before you forget.
Passport Photo Maker is a user-friendly software designed to help you take and edit your travel photos to meet specific government requirements. It’s packed with features that guide you through the process, ensuring that your photos are compliant with the stringent guidelines set by passport and visa authorities. The best part? You can do all of this from the comfort of your own home.
But first, take a good shot with your camera! Here come some quick recommendations on how you best do it.
Quick Tips for Taking Your Photo

Choose the Right Time and Place
Pick a spot with plenty of natural light but avoid direct sunlight to prevent harsh shadows on your face. Try to ensure compliance with the visa or passport photo guidelines. A plain wall as a background normally does just fine.
Dress Appropriately
Wear clothing that contrasts with the background. Avoid busy patterns or vivid colours, as they can distract from your face. A neutral suit or shirt usually works best.
Mind Your Expression
For travel document photos, it’s best to have a neutral expression. That means no smiles, but you should keep your eyes open and make sure you’re looking straight at the camera.
Get Your Position Right
Ensure that your head is centred and that you leave enough space above your head. The software will help with cropping, but getting the positioning right initially can save you time in editing.
Check Your Height
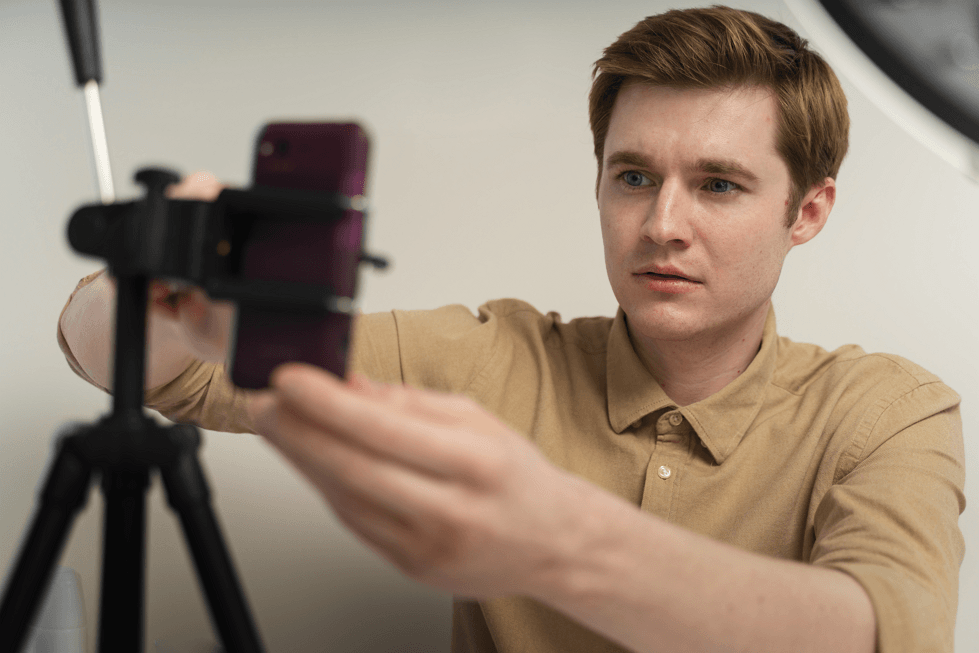
Be mindful of the height at which you take the photo. The camera should be at eye level for the best result (to achieve that, put it on a tripod and experiment with its adjustable legs). This ensures that your features are captured accurately.
Editing Photos on Your Device
Whatever raw shots you have made, they cannot possibly be included in your visa application or printed out right as they are. It’s time to make them comply with the government requirements. Some slight editing will do no harm as well. Don’t worry, though – Passport Photo Maker will take care of almost anything at this stage!
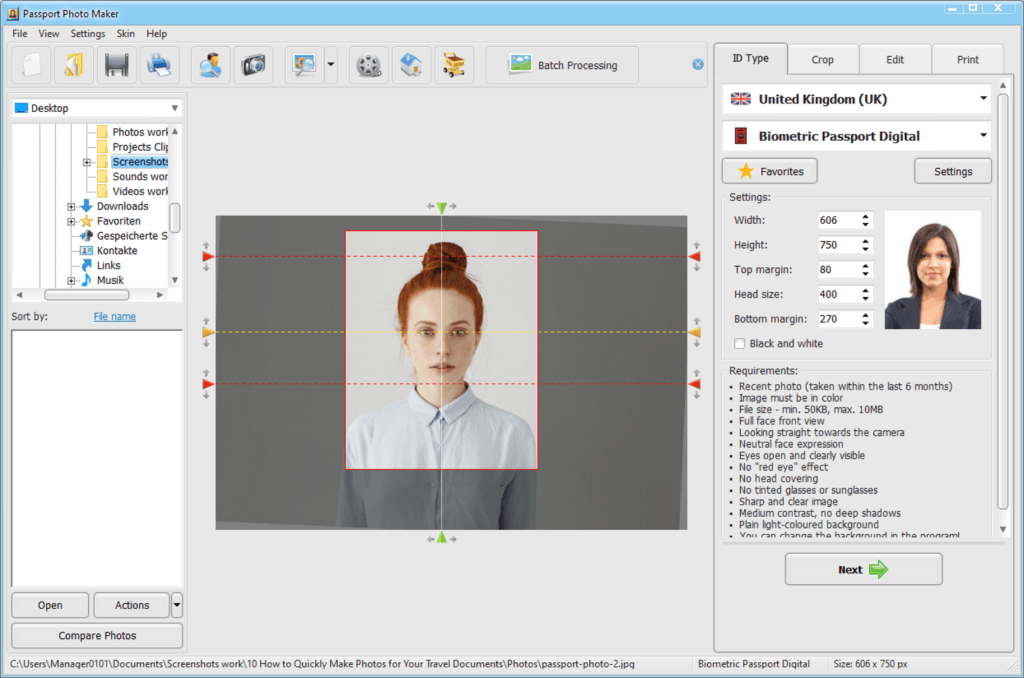
To start working with the program, install it and open the pictures you’ve taken before. (Both a file tree and the ‘Open’ icon are to be found in the upper left corner.) Select your country and the document type you are preparing your photos for in the ‘ID Type’ tab. As a rule, the program adjusts your photo automatically by setting it right if it was askew or showing you the area to be cropped. Click ‘Next’ to proceed to ‘Crop’ and ‘Edit.’

Your work on a good shot basically ends here — simply don’t forget to click ‘Next’ again and again until you’ve arrived at the ‘Print’ tab. The final result can then be printed or saved to file (as for a digital application which is to be submitted online). However, the program still can boast of additional features that may help you out if your equipment has let you down.
Once in the ‘Edit’ tab, you can
- sharpen or blur your photo with the ‘Photo retouching’ tool,
- change its brightness and saturation, lighten its dark areas or dim its dark ones,
- change the background to any monotone colour which is needed,
- or even digitally replace your clothes (in the case you forgot about our quick tips above or simply haven’t got any formal suit for the occasion).
Choose the number of the photos to be printed in the ‘Print’ section — the pictures will be automatically shrunk to the required standards. The program would even allow you to print two different layouts of photos, say, the one for your visa and another one for your travel passport — and that on one single sheet of paper! (We recommend that you use high quality photo paper if your home printer allows for it.)
Conclusion

Creating the perfect travel document photo doesn’t have to be a headache. You can produce high-quality, compliant images from the comfort of your own home. With useful features like autorotation, background removal, ‘changing clothes,’ and other editing tools, you’ll find that preparing your photos is not just straightforward but also enjoyable. We wish you a happy journey – and flawless photos for your travel documents!

